WorkSchedule.net Mobile
The Schedule initially loads using your assigned Mobile Default View.
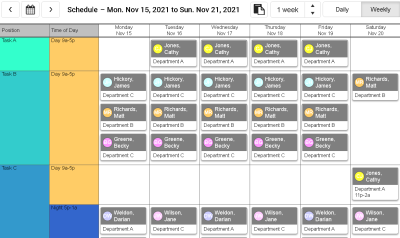
Viewing the Schedule
WorkSchedule.Net Mobile is capable of the same views as the desktop version, with some visual changes designed for smaller displays.
Sorts will appear horizontally above the row of time blocks.
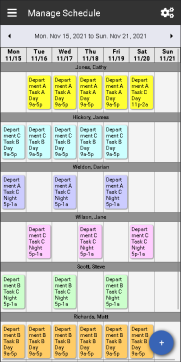
| Mobile | WorkSchedule.net Desktop |
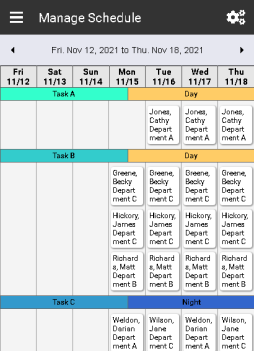
|
|
Navigating the schedule
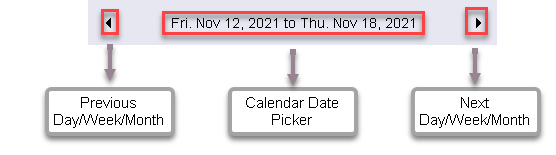
Clicking the Left or Right arrows will take you forward or backwards in the schedule based on your view.
While in:
- Daily View
Arrows: Navigate backward / forward by one day
Calendar: Takes you to the selected day - Weekly View
Arrows: Navigate backward / forward by a week
Calendar: Takes you to the beginning of the week for the selected day - Monthly View
Arrows: Navigate backward / forward by a month
Calendar: Takes you to the beginning of the month for the selected day - Yearly View
Arrows: Navigate backward / forward by a month
Calendar: Takes you to the beginning of the month for the selected day
Changing the Schedule View

Clicking on the
 icon on the top-right corner will open the side view menu with links and options to affect your current view.
The Yearly View option will only appear while your current view is set to Yearly.
Yearly View, Sort, and Filter settings can also be changed by Accessing the View option.
Adding Time blocks
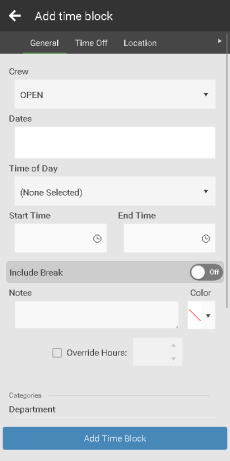
If you do not have any time blocks selected, there will be a  button in the bottom right corner.
The Add Time Block window functions similarly to the Time Block Edit Pane with a few differences.
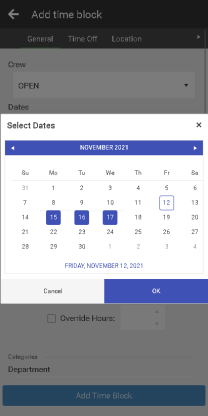
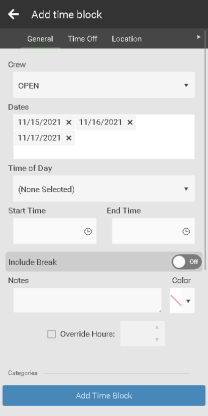
Clicking the Dates box will open a calendar where you can select multiple days to add copies of the time block.
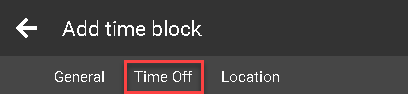
Adding Time Off
Time off can be added by tapping the
add time block button. Tap time off at the top of the screen.
Editing Time Blocks
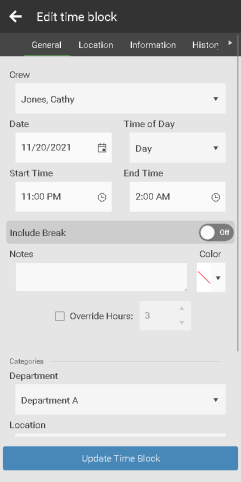
Tapping on a time block will bring up the Edit Time block window.
The key difference from the Add Time block window is there is a single Date input, instead of the multiple Dates.
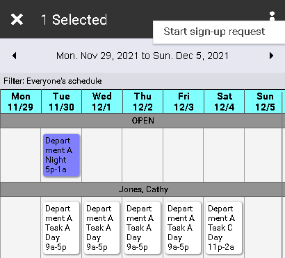
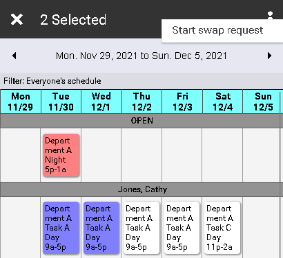
Selecting Time Blocks
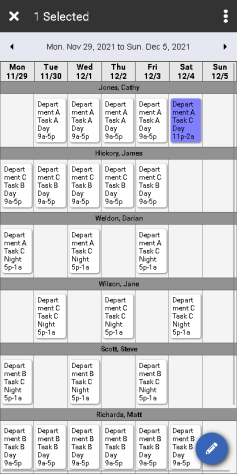
In order to Delete, Move, or Copy time blocks you first have to select them.
Tap and hold a time block you wish to select. This will switch you to Selection Mode. You can tell you are selection mode when the header changes to show (X) Selected at the top.

From here, you can tap on a time block to select it and tap on any selected shift to de-select it.
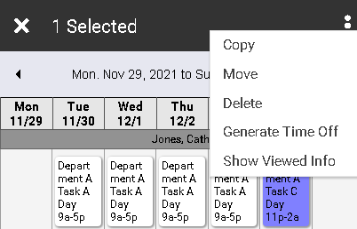
To leave selection mode without making any changes, simply tap the  button on the top left corner.
Tapping the  icon on the top right corner will pull down the action menu.
Drag and Drop Time Blocks
To drag and drop time blocks:
- Tap and hold a time block to enter Selection Mode
- Lift your finger and tap any additional time blocks you wish to move. If you do not want to select any additional time blocks, you will still need to lift your finger to drag the currently selected time block.
- Tap and hold a selected time block, then drag the time block to where you would like to move it to.
- Life your finger to release the time block and process the move.
Drag and drop on WorkSchedule.Net Mobile follows the same rules as the desktop version.
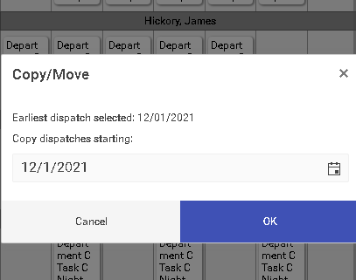
Copy/Move Time blocks
In the mobile app copy and move work a bit differently.
After selecting the time blocks you wish to copy or move, tap the  icon on the top right corner to pull down the action menu, and then tap on copy or move.
Copy and Move function the same as the desktop version, but instead of right-clicking on the day you want to move or copy to, you will select the day from the date picker.
Time blocks will be copies or moved relative to the earliest time block selected, and just like the desktop version, when you copy time blocks from multiple days that are not directly next to each other horizontally, the spacing between the days is kept the same.
Swap and Sign Up
In the mobile app employees can swap and sign up for time blocks in the employee schedule. The select the time block or time blocks they want to swap or sign up for. They then select the to start a sign up request or a swap request.
Copyright © 2021 Program Works